Thursday, June 28, 2012

DIY LMFAO Party Rock Pants


Lets turn these regular white skinnies! 


and transform them into these party rocking shorts!


First measure how long you want them to be cut, Then go ahead and chop them off!
I like to cut them a little bit shorter in the front than in the back because I have kind of a big bum, and this compensates for my bum.


I decided to make them into 5 inch shorts


Using Rit purple fabric dye we are going to color them 


Fill a bucket up with 3 gallons of hot water 

then mix one teaspoon of dye in one cup of hot water

Then mix the dye water in with the regular water and stir it up

This is done so that the dye is as even as posible


Put your pants in the mix and stir them constantly, make sure to check the pants frequently to that you get the right shade.

I only had my pants in for like a minute 


When they are the right color it is time to rinse them out I like to start with warm water and work my way over to colder water when I rinse the fabric out.

Then Toss them into the washing machine and dry them 


While they are in the washer, print out a leopard print and cut the black out with and x-acto knife


Once you have cut out all the black spots use a fabric paint marker to trace the pattern onto some pants then fill in all the spots! 


That is pretty much it!

Here is the same tutorial just in video form:


Let me know what you guys think!


Sunday, June 24, 2012

This One Time I Went To Lagoon...


So, the other day, me and my friends went to Lagoon for the day. It was the most fun I have had in a long time. We literally rode rides all day from the time it opened to the time it closed. I have THE best friends in the entire world :) Not to mention we played TOP GUN the entire time so we were pretty much the cool kids. This is just a little video of the day :)


Can I just take a second and rant a little bit about friends? Well, I am going to anyway. So once upon a time I made these crazy friends and we do EVERYTHING together. We are always up to something, and it never gets old. We even have fun doing silly things like hair cutting night or bachelorette night (unless of course those stupid frat boys try to crash our girls night, those jerks...) We watch movies together, have bon fires, go on bike rides, we practically live at each others houses and borrow each others clothes. 


We are all different shapes and sizes, none of us are the same age, we all come from different backgrounds. We are crazy and all kind of screwed up. We all have our trials but in the end we are the best of friends. We always have each others backs, and I will defend them to the very end.


I am the luckiest person on the planet. 


Thursday, June 21, 2012

Best Peach Cobbler Ever! (For those of us that don't like chunks of fruit!)

This Peach cobbler has only 3 ingredients!
Peaches
Can of Sprite (I used shasta)
Box of cake mix


First off, grind up your peaches in the blender!


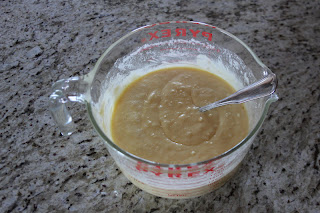
Then mix the cake mix and sprite together


Layer it 
cake - peaches - cake


Sprinkle some white sugar on top, to give it a bit more sweetness and a textured top layer


Bake in the oven at 375* for 45 minutes


Then enjoy your fruit chunk-less peach cobbler!!

Monday, June 18, 2012

Out For Lunch Outfit

So The other day I went out to lunch with my best friend and this is what I wore. Can I just say that  was a pretty perfect day to wear this very outfit?!

Even though it has a lot of layers, the layers are thin and light, the weather was not to hot and not to cold so everything worked out great

No jewelry, I wanted to keep it as simple as I could, Plus with the lace texture of the shirt and the wild print from the scarf, this outfit really didn't need any bling

My hair is day old curls (yes, I used my new curling iron, it is amazing!)
Also, I have a new red peak of color in my hair where the blond used to be

Also, Check out my photo editing skills? I think I am going to start doing more photos in a setting like this, I like it and you can see more than one at a time, but I defiantly need more practice!


Coral Pants: JC Penny's
Lace Top: Shopko
Over Sized Grandpa Cardigain: Old Navy
Oxford heals: Pay-less
Printed Scarf: DIY-ed By Me


Friday, June 15, 2012

DIY Sharpie Designs T-Shirt

A little while back I found this cut off sweatshirt and I thought, why not do something awesome with it? So I grabbed a few things and this Is what I ended up doing.


Step 1:

Lay shirt flat and put a piece of cardboard (I used a manilla folder) Inside the shirt, so that the sharpie doesn't bleed through 


Step 2:

Using duct tape or masking tape, tape off the section of the shirt you want to draw on. I decided on this chevron like shape, mostly because I thought it was super cool.
I did this on the back of the shirt


Step 3:

Blue Arrow: Use a ruler to draw straight lines across the taped off section

Step 4:

Green Arrow: Fill in the lines with cool designs, I went for more of a tribal feel, with lots of triangles, zigzags and straight lines


Step 5:

Take the tape off to reveal a polished super cool design!

Tuesday, June 12, 2012

DIY Hula Hoop Chandelier

So Recently I had plans to host a backyard luau party. Unfortunately The weather said no, so I decided to do FOOTLOOSE instead. In about 3  hours I cleared my entire shed out, laid down a floor rug, whipped up some barn dance treats, ran an electrical chord out side and made a chandelier. I seriously did all of this in about three hours! 

The original Idea came from this website:http://sarahontheblog.blogspot.com/2012/04/hula-hoop-chandelier.html

The Chandelier took me about 30 minutes. It was quick, easy and really made the shed look great!


Materials:
Hula Hoop
Thick Satin Fabric
Glue Gun
Scissors
Bailing Twine 
Twisty Ties


Cut 8 three foot long pieces of bailing twine and tie them onto the hula hoop like spokes on a bicycle 


Cut your fabric into strips that are about 2 inches wide, and as long as your fabric


Using hot glue to tack down the fabric, start wrapping the strips around your hula hoop. When you get to a spot where the twine was tied, make sure to hide the knot with your fabric, then just keep on wrapping


This is what the hula hoop looked like after I finished wrapping and glueing the fabric down


Next take some Icicle christmas lights and attach them to your hula hoop. I used twisty ties to secure the lights to the hoop, They were fast and easy, and they really got the job done


Next Pull all your spokes together and tie a knot in the top of the bailing twine. Do this and make sure your hula hoop is relatively balanced and even. 


Plug an extension chord into the lights, and hoist the chandelier up into the rafters!

This was really really easy to do, and totally set the mood for the party. Everyone loved it and I gives of a surprising amount of light as well!


Friday, June 8, 2012

DIY Chain Heal Clip


So a while ago, I Bought this chain bracelet, thinking that I would wear it all the time. Well I never did and so I decided to make use of all the chain!


You will need:
Needle Nose Pliers
Chain lengths: 6 1/2, 5 1/2, 4 1/2, 3 1/2
Jump Rings
Shoe Clips (not pictured)
Basically all you do is take a small jump ring and connect all the left side with one ring. Then connect all the right side with another ring. Use the needle nosed pliers to help with this process. Once you have created the connected chain piece (pictured above) use the jump ring to connect the chain to the shoe clip. The last step is to hide the shoe clip by gluing a jewel on top of it. Mine is a "Diamond" button that I cut off the button loop on the back and hot glued on. I found the buttons at Walmart.

Now all that is left to do is Clip the chain on the heals of your shoes


Really easy to do and only took me about 20 min. To make 2 shoe clips. 

Tuesday, June 5, 2012

DIY Shoe Clip: Chunky Bow


So Shoe clips are great because they can turn any shoe into a completely different pair of shoes! I thought that I would do a few shoe clip tutorials and this is one that is easy and goes well with any shoe so lets get started


Supplies:
3 lengths of thick ribbon: 3 inch, 5 1/2 inch, 6 1/2 inch
Shoe clip
Small rectangle of felt
Hot Glue


First off hot glue the two longest pieces of ribbon into circles


Next fold them in half and glue the inside half marks together


Glue the small loop on top of the big loope


Take the 3 inch section of ribbon and glue it to the back of the two layered loops


wrap the 3 inch piece once around the two loops and glue it in place


This is what your bow should look like


Next glue the small rectangle of felt to the shoe clip


Finally glue the shoe clip and the felt to the bow


Now you can clip them on any shoe! 


Sunday, June 3, 2012

DIY: Shoe Clip Basics

So Here is the same leopard print ballet flats with the big red bow on the tow, just as before right? 
WRONG!!
The red bows are now removable shoe clips!


How did I do it? Well read on to find out!


This is the bow that came on the shoes orriginally. It is big, red, and loud! After I unpicked the seams that were holding the bow to the shoe I grabbed a shoe clip and some matching red felt and glued it all together. 


So here is the finished shoe clip. Can you say way to easy?!


These can now be clipped onto any pair of shoes! Talk about jazzing up a pair of shoes right?!


Check back for more DIY!